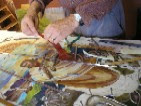
 Now it comes time to "lead-up" the stained glass window. Each of the hundreds of pieces of glass will be joined with lead cames. This is a meticulous fitting process as the window must match the pattern itself each step of the way.
First, each piece of glass is measured by rolling the edge on the lead, marking the end, and then cutting the came.


Then the lead came, being quite soft, is bent and formed around the glass piece. After marking with the lead knife, the lead is trimmed to fit with lead side-cutters.


The piece is then temporarily held in place with horseshoe nails, and the procedure is repeated piece-by-piece until the entire window is completely assembled and ready to solder.


